Description: Is there a free MBR to GPT converter? Here, a powerful MBR to GPT conversion tool will be provided.
Keywords: free mbr to gpt converter, free tools to convert mbr to gpt, mbr to gpt without data loss
Summary: In this post, you are going to learn a free MBR to GPT converter named AOMEI Partition Assistant, which can convert MBR to GPT without data loss.
Overview of MBR and GPT
Usually, MBR and GPT are called partition styles, and they are two different ways of managing disks. MBR is an old partition style, while GPT is a new partition style that replaces MBR gradually.
In general, MBR and GPT different in partition size, number of primary partitions, and boot mode. MBR supports up to 2TB disk, can create up to 4 primary partitions or 3 primary partitions + 1 extended partition, and MBR needs to be booted by BIOS. And GPT supports a maximum disk of 18EB, can create up to 128 partitions, and GPT is booted by UEFI.
Why do we convert MBR to GPT?
In recent years, more and more users want to convert MBR to GPT window 10. Usually, it is based on the following reasons:
- Make full use of disk
MBR only supports up to 2TB of disk, the part beyond that will not be recognized by Windows. Therefore, in order to fully use the disk space, you can convert MBR to GPT.
- Upgrading the system
Microsoft has announced that Windows 11 requires a GPT system disk and UEFI boot mode, which means that upgrading from Windows 10 to Windows 11 via “Check for Update” requires converting the system disk to GPT.
- Personal preferences
Since GPT is a new partition style and is not subject to various restrictions.
The importance of free MBR to GPT converter(Data Safe)
Sometimes, Convert to GPT Disk will grayed out when converting MBR to GPT with Disk Management. This is because Disk Management can only convert empty disk to GPT. For this, you need to delete all partitions on the disk, but you will lose data.
How to convert MBR to GPT without data loss? You can always trust a free partition software – AOMEI Partition Assistant Standard. There are so many free tools to convert MBR to GPT on the market, but it is the most trustworthy. Because it can convert MBR/GPT to MBR/GPT within 3 steps and will not damage the data. In addition, it has the following advantages:
- Available for Windows 11, 10, 8, 7, Vista, and XP.
- It is absolutely safe and does not carry any bundled software.
- The interface is friendly and provides detailed guidance.
- All-in-one tool, provides a variety of useful functions.
It can also solve other problems easily, such as Windows extend volume greyed out, migrate Windows 10 to SSD, clone SSD to larger SSD, format partition to GPT, etc. Besides, it can also help you clone hdd to ssd free, which is a very useful disk clone software.
Warning: Std version support to convert data disk from MBR/GPT to MBR/GPT. If you need to convert system disk from MBR/GPT to MBR/GPT, you can try Pro Edition. For Windows Server users, please turn to Server Edition which is designed for Windows Server 2022, 2019, 2016, 2012, 2008, 2003.
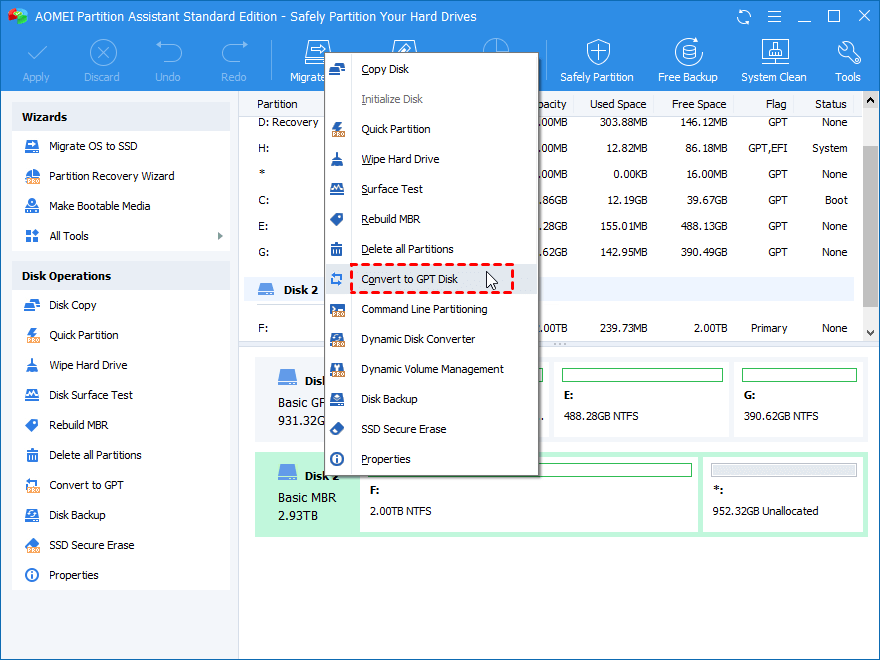
Step 1. Install and open this free MBR to GPT converter. Then, right click the target disk(Take Disk 2 as an example) and select “Convert to GPT Disk”.
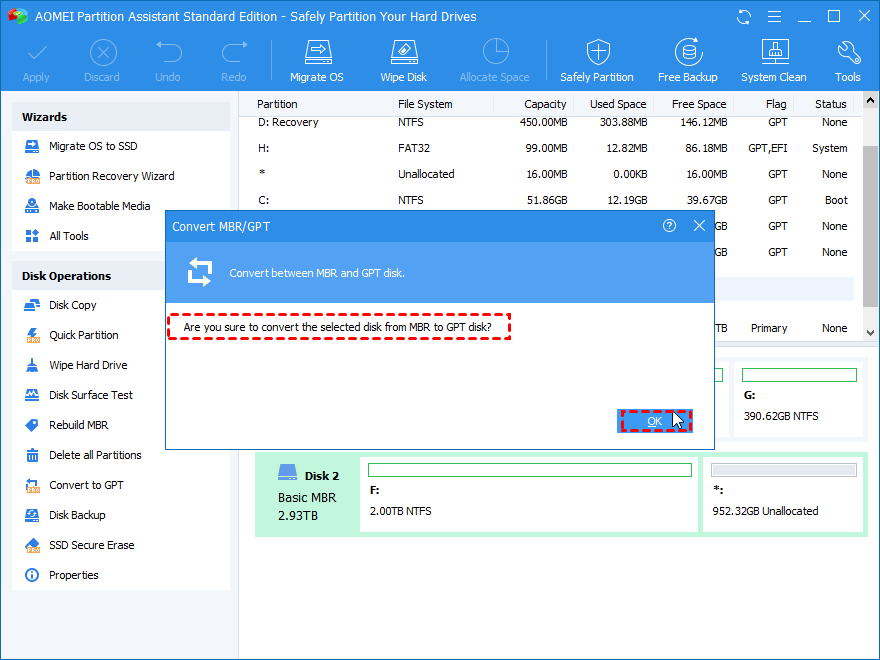
Step 2. After that, read the pop out window and click “Yes” and “OK” one by one.
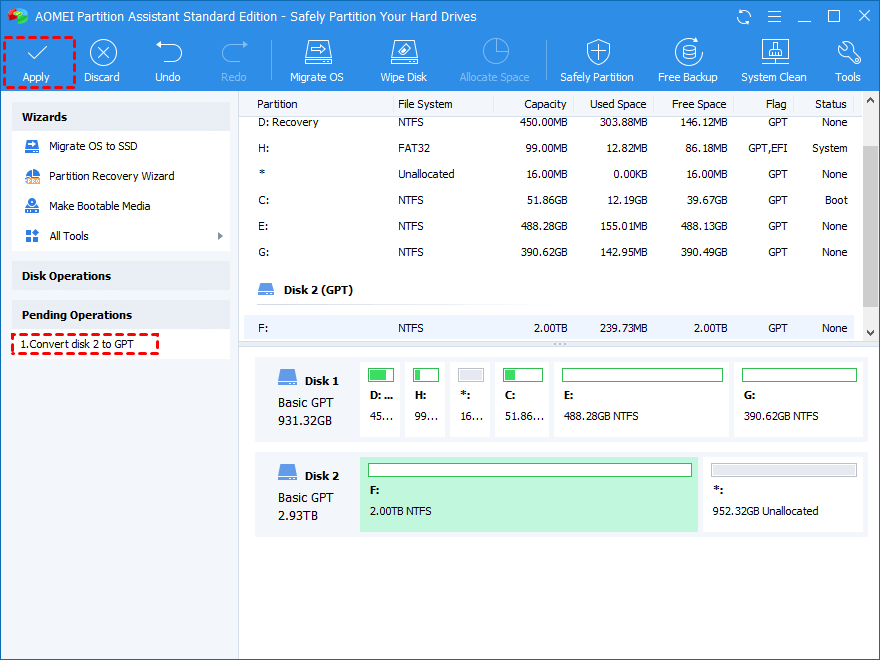
Step 3. Finally, click “Apply” to submit the operations.
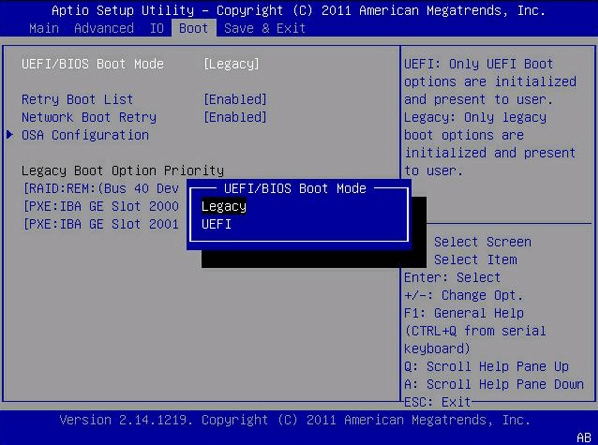
Follow up: Change boot mode from BIOS to UEFI
If you need to convert the system disk to GPT, you must ensure that the computer motherboard supports UEFI boot mode before conversion, otherwise the computer cannot be started successfully. After the conversion, to run Windows from the GPT disk, you need to go enter the BIOS setting and change the boot mode from BIOS to UEFI. Because the GPT system disk must match the UEFI boot mode.
Step 1. Press the shortcut keys (F10/F11/F12/ESC) continuously to enter the BIOS setting when you startup the PC.
Step 2. After entering, control the arrow keys on the keyboard to navigate to the Boot option. Then, change the boot mode from BIOS to UEFI.
Step 3. Finally, you can follow the prompts to save the settings and exit.